Importing Local Files into a Project
STEPS
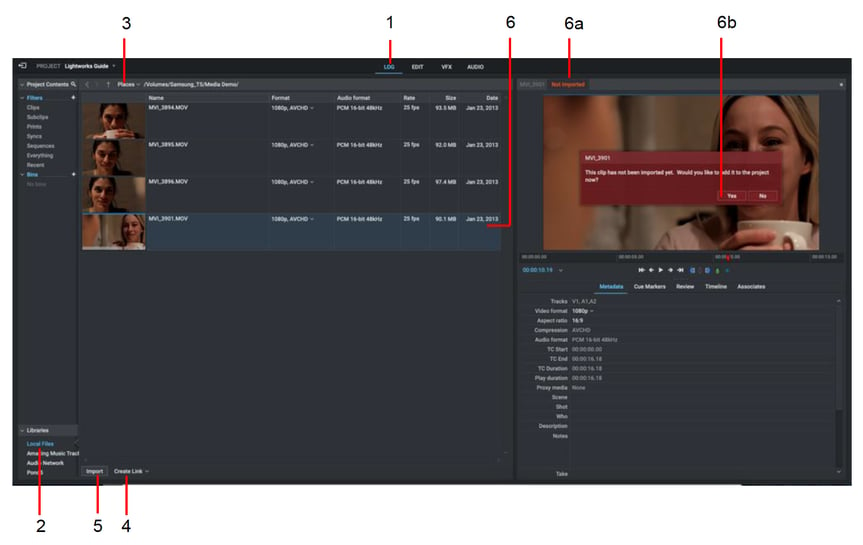
1. Make sure you have the Edit or Log tab selected.
2. Click on the Local Files option under ‘Libraries’.
3. Click on the Places dropdown arrow to navigate to the drive and folder you require.
4. Select the import method from the drop down list. The options are:
• Create Link - Keeps the imported file in its original location and format so you can work with the file natively. This is useful if you have already copied the media to a local/network drive that is not going to be removed or disconnected.
• Copy Local - Copies the file into the ‘Material’ and ‘Sound’ folder, without transcoding. This allows the drive containing the original media to be disconnected and reused, without affecting the project.
• Transcode - Copies the file into the ‘Material’ and ‘Sound’ folder, transcoding it to the chosen Type/Compression this is useful for improving the speed/responsiveness during editing.
5. Click on a clip to select it for import to your project or hold down the Shift or Ctrl key (CMD key on macOS) to select multiple clips and click the ‘Import’ button.
On importing the clips, the Content Manager auto switches to the Bin or Filter containing the clips you imported.
6. Double clicking a clip will load it into the source viewer. This has not imported the clip into the project, it simply allows you to play the clip in a larger viewer. A clip will need to be imported into a project in order to edit it together with other clips.
a) The clip can be imported by clicking the ‘Not imported’ text at the top of the viewer
b) Click ‘Yes’ on the panel that opens to import the clip into the project.
Content Manager
The content manager is where you can find all the assets contained under the ‘Project Contents’ heading on the left-hand side. This is split into several sections: Filters, Bins and Libraries.
Filters: These are active filters that will always show you the content that matches the name of the Filter. They are updated automatically and remain active the entire time and are a quick way of finding content in smaller projects. These will all be empty and inactive in newly created projects.
Bins: These are very useful for managing lots of assets in larger projects. They are manually created and named and only show content that was manually placed within them. Multiple Bins can be grouped together in a Group.
Libraries: This is where you bring content into a project. Content can be imported from local hard drives, network drives and third-party media stock providers such as Audio Network, Amazing Music Tracks and Pond5.
When selecting a Filter, Bin or Library, the contents within will show in the section on the right, this is where you will see assets (Clips, Audio, Images etc) the view can be changed to show just the thumbnail images as tiles (Tiles view) or it can be switched to show a thumbnail image and information about the assets (List view).
Browsing the Content Manager
STEPS
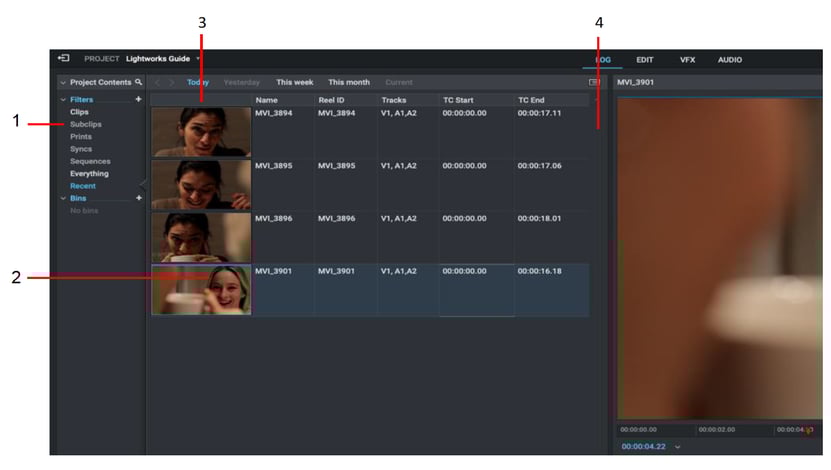
1. Make sure the Log tab is selected.
2. Select the ‘Clips’ Filter displayed under Filters in the Content List panel.
3. Results display in the main window.
4. Step backwards and forwards through Content List items by clicking the Browse buttons.
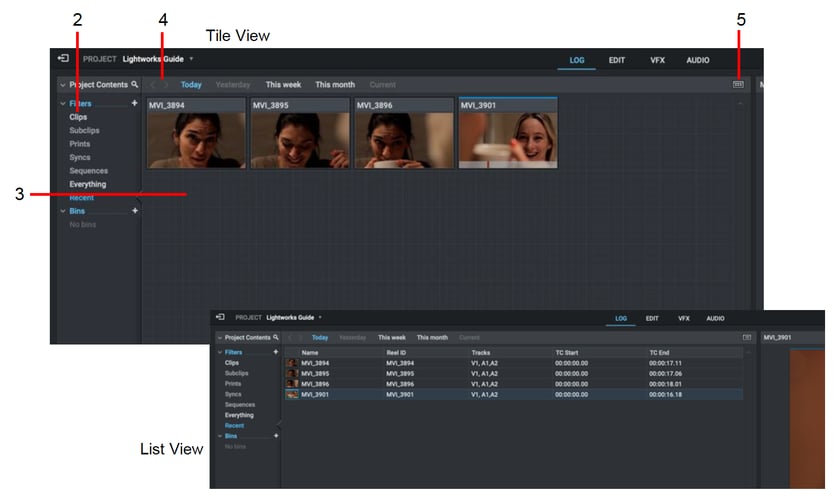
5. Toggle between Tile and List views by clicking the View button. The Content Manager has two main display modes:
• Tile View - Clips and Sequences display as thumbnails
• List View - Clips and Sequences display in a list format with relevant metadata and a smaller thumbnail to aid identification.
Using the Filter Types
Filters are extremely useful for finding your content quickly and easily. They are active searches that always show the content that is available within them. They do not need to be refreshed, as they are always active within the project. The Filter names become active when there is content within them and inactive when they are empty.
STEPS
1. In the Content List panel, click on one of the following Filters:
• Clips – All actual media contained within the project
• Subclips – All subclips that have been created from an actual media file
• Sequences – All sequences that have been created
• Everything – A mix of Clips, Subclips, Sequences etc
• Recent – Anything that has been created or imported during the session
2. The main panel displays the contents of the Filter you selected.
3. To change the sort order of displayed items, click the column header you want to sort on. Clicking the same column header again reverses the displayed order.
4. There are horizontal and vertical scroll bars to help show columns or content positioned beyond the viewing frame border.
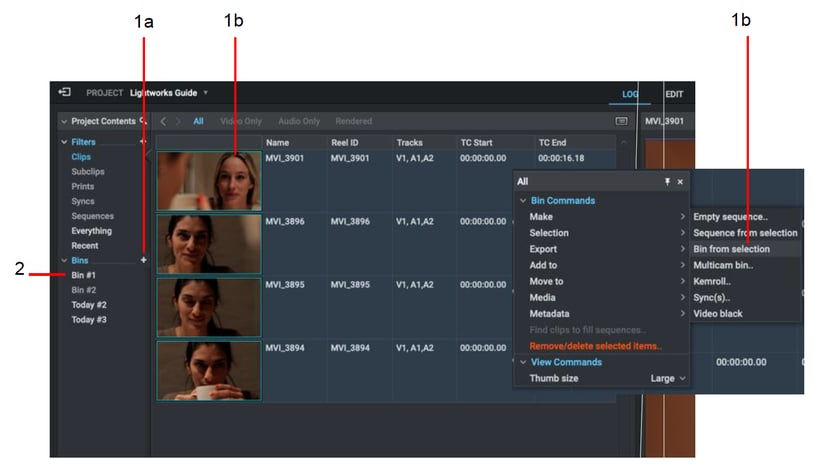
Bins
Bins are containers within Lightworks that you can use to store your media and sequences. Although similar to Filters they do not dynamically update like they do, they just show the content you place in them. You can create as many bins as necessary and name then as you require, they can even be grouped together. Bins are useful to help arrange large projects or find clips quickly and easily.
Creating a Bin
STEPS
1. Do one of the following:
a) Click on the + icon next to Bins in the Content List panel.
b) Select two or more clips, right-click and, from the menu that opens, select Make> Bin from selection.
2. The new bin displays as an entry below ‘Bins’ under ‘Project Contents’.
3. Type the name you want for your Bin directly into the text box and press Enter to confirm.
4. You can change the name of a Bin at any time, simply double click the Bin name.
Resources and Support
Troubleshooting
If you experience an issue with your Lightworks installation, or something isn't working as expected, visit our FAQ page. If you do not find an answer to your question, you can refer to the Lightworks forum.
The Status window provides useful information for troubleshooting issues with Lightworks. You may be asked to open this when contacting the forums.