.webp)
Get Video Editing Tips, Tricks, and Guides Straight to Your Inbox
Editor's Note: We asked a special guest writer to submit a piece on the basics of video editing workflows to give you a break from our usual writers. Asking to be identified as “Rordon Gamsey” for privacy reasons, this guest admits they usually operate in the kitchen rather than the editing room but felt their expertise may be valid here.
Welcome, you talented bunch, to the world of video editing! I'm Rordon Gamsay and today, we're diving headfirst into the chaotic, exhilarating, and sometimes downright "bloody" world of video production. So, fasten your seatbelts because we're about to add some serious zing to your video editing skills, you donkeys!
Before we unleash the beast, let me tell you something essential about video editing. It's like running a busy kitchen - you need a well-orchestrated brigade to serve those delectable dishes. In our case, that brigade is the video editing workflow, and trust me, it's your secret sauce for success. Don't be a plonker; pay attention!
A flawless video editing workflow is as crucial as getting your risotto to the perfect consistency. It must:
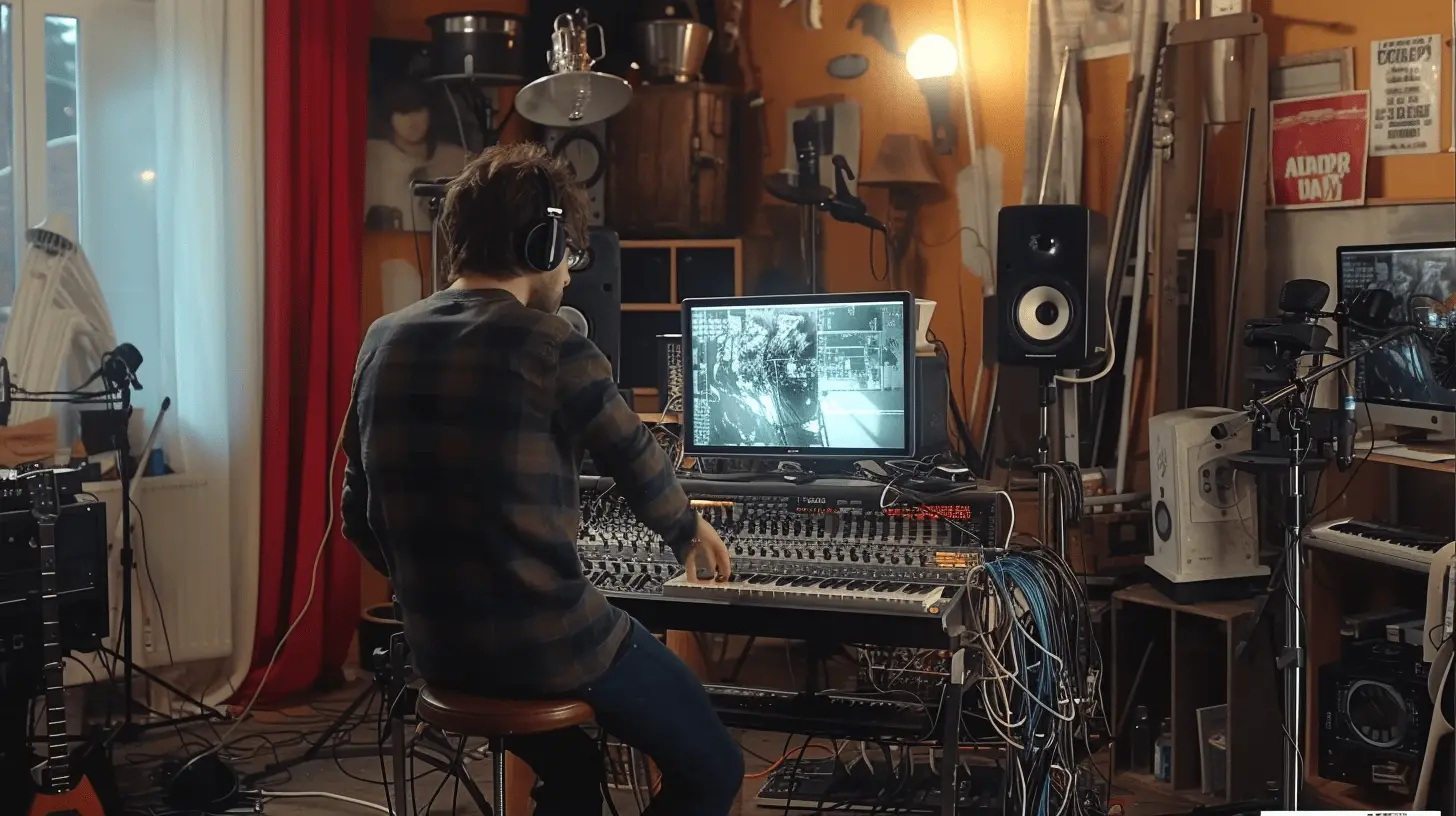
Imagine your editing software as your entire professional kitchen, complete with gleaming knives, state-of-the-art ovens, pots, pans, and even those trusty fryers. It's not just a tool; it's your culinary arsenal for conquering the chaotic art of video editing.
In the same way, a high-end kitchen might seem challenging, advanced software like Lightworks can be a bit of a beast. Don’t worry, though; with a bit of graft and some know-how, it’s easy to tame it.
Before we fire up the stovetop, let's discuss ingredients - your media assets. Whether you're creating a culinary masterpiece or crafting a video, you need to know where your stuff is. A cluttered kitchen is a recipe for disaster, just like a messy file system in video editing. Get your assets organised, just like you'd tidy up your kitchen, and you're halfway there, you lazy buggers.
Create a Folder Structure: Just like you'd have dedicated shelves for spices, pots, and pans in your kitchen, create folders for different media types - videos, images, audio, etc. Keep everything neatly organised.
Use Descriptive Filenames: Don't be vague with your filenames. Instead of "Video001," use something like "Interview_with_John_Smith_2023." This way, you can quickly identify your files.
Date and Version Control: If you're working on multiple project versions, include dates or version numbers in your file names. It's like labelling your food containers with expiration dates - you'll never get confused and won't get anyone sick.
Backup Regularly: Just as you wouldn't want to lose your secret sauce recipe, you don't want to lose your precious media. Set up regular backups to an external drive or cloud storage.
Colour-Coding: Like using colour-coded labels in your kitchen, you can colour-code folders or files to group related content. It makes finding what you need a breeze.
Metadata and Tags: Think of metadata and tags as your recipe index. Add keywords, descriptions, and tags to your files so you can quickly search and sort them.
Delete Unneeded Files: Just as you toss out expired ingredients, don't hoard unnecessary files; you don't want to find you have no space at a stock delivery in a lunch rush. Regularly review and delete anything you no longer need.
Master the Art of Subfolders: Use subfolders within your main categories for even more organisation. It's like having separate drawers for different types of utensils in your kitchen.
Consistent File Formats: Standardise your file formats where possible. It's like using uniform containers in your kitchen; it creates a sense of order.
Document Your System: Just as a recipe book helps you log your best dishes, document your file organisation system. This way, if someone else needs to step into your shoes, they won't be lost in your kitchen.
So, there you have it - my top tips for organising your assets like a pro. Follow these, and you'll be navigating your media kitchen with the finesse of a Michelin-star chef!
Enough chit-chat; let's get down to brass tacks, shall we? Here's our step-by-step recipe for video editing using Lightworks:
First things first, gather your ingredients - your media files. This includes videos, images, and audio. Lightworks makes this as easy as shelling peas. Import your assets and keep them organised within your project, just like you'd organise your pantry, which would be meticulous.
Alright, now that you've got your kitchen organised, it's time to get cooking, or in this case, editing. Think of this step as building the base for your culinary creation - your rough cut. Just like when you're crafting a dish, focus on the storyline in your video. It's all about building layers of flavour, but in this case, it's layers of narrative.
Start with the Best Ingredients: Begin with your best footage. Just as you'd choose the finest ingredients for your signature dish, use your most compelling shots for the rough cut. You want to make a great first impression.
Create a Storyboard: Just like planning your courses for a multi-course meal, create a storyboard or outline of your video. This helps you visualise the flow and structure before you dive into editing.
Don't Overcomplicate: Simplicity is key, my friends. Don't try to cram too much into the rough cut. Focus on the main storyline, and save the fancy tricks for later.
Use the Right Takes: Pick the right takes for each scene, just as you'd select the right ingredients for your dish. Pay attention to pacing, performance, and continuity.
Cut to the Beat: If your video has music or a beat, edit to it. It's like dancing in the kitchen while you cook; it adds rhythm and energy to your video.
Seek Feedback: Just as a taste test can reveal the flaws in your dish, seek feedback on your rough cut. Fresh eyes can spot issues you might have missed.
We've got our rough cut on the table, but you’re an utter mug of bad chef tea if you think it’s ready to be served. Fine-tuning the edit is like perfecting a classic sauce - it elevates the entire creation. Let’s add some complexity (to taste).
Trim with Precision: Just as you'd trim excess fat from a cut of meat, trim your clips with precision. Use Lightworks' trimming tools to remove any unnecessary bits and create a tight, polished edit. Every second counts, so don't waste your audience's time.
Master the Split Edit: Think of a split edit as a perfect pairing of wine and food. It's when the audio and video aren't in sync, creating a dynamic effect. Lightworks lets you easily create split edits to add depth and emotion to your video. It's like finding that perfect wine to complement your dish.
Embrace Adjustment Layers: Adjustment layers are like adding a secret blend of herbs and spices to your dish; they enhance the overall flavor. In Lightworks, use adjustment layers to apply effects or color grading to multiple clips simultaneously. It saves time and ensures consistency throughout your video.
Maintain Continuity: Just as you'd want your dish to have a consistent flavor profile, maintain continuity in your video. Pay attention to details like the position of objects, the lighting, and the sound between shots. Lightworks' tools can help you achieve this seamlessly.
Every chef worth their salt knows a good meal is as much a feast for the eyes as the mouth. We're not here to make it look like a dog's dinner; we aim for Michelin-star quality, take photos and put them on Instagram quality. And for that, It's all about presentation, my friends.
Less is More: Just as you wouldn't drown a dish in sauce, don't go overboard with transitions and effects. Subtlety is key. Pick transitions and effects that enhance your storyline rather than distract from it. Keep it elegant and restrained, just like a perfectly sauced reduction.
Match the Mood, Don't Clash: Think of transitions and effects as seasoning; they should complement the overall flavour of your video. Choose transitions that match the mood and style of your content. Smooth transitions for a calm atmosphere and edgier ones for a more dramatic feel.
The Art of Timing: Timing is everything in the kitchen and video editing alike. Pay attention to when and where you use transitions and effects. Use them to guide your audience's attention and emphasise critical moments. It's like a perfectly timed flourish in the final plating of a dish.
Experiment and Preview: Just as a chef tastes their creation before it leaves the kitchen, preview your transitions and effects. Lightworks allows you to experiment with different options. Try them out, see how they feel, and choose the ones that elevate your video's visual appeal.
Linking It All Together: Think of your transitions as the courses of a tasting menu; they should flow seamlessly. Use Lightworks' tools to create smooth transitions between scenes. A well-crafted transition can make your video feel like a cohesive journey rather than a disjointed collection of clips.
And as a bonus tip, if you're hungry for more insights on transitions, check out our blog post here. It's like getting a new recipe to spice up your video editing skills.
Serving up a top-notch dish isn’t just about the food but the entire bloody experience! Setting the right tone, mood, and ambience is the absolute difference between an amateur serving up slop and a professional serving up a dish that will make your mouth water. This is where audio comes in. It makes up 50% of this audio-visual medium, so you’d be a complete mug to ignore it.
Prioritise Clean Sound: Start with clean audio recordings, just as you'd begin with quality ingredients in your kitchen. Use a decent microphone and minimise background noise during recording. Crisp audio is the foundation of a successful video.
Sync Like a Maestro: Syncing audio and video is like getting the timing right in a complex dish. Use Lightworks' tools to align your audio tracks precisely. A well-synced video and audio will make your content look and sound professional.
Layer Sound Effects Sparingly: Sound effects are like spices; a little goes a long way. Use them sparingly to enhance specific moments in your video. Don't overwhelm your audience with a cacophony of unnecessary noise.
Choose the Right Music: Selecting the right music is like choosing the perfect wine pairing. It should complement the mood and tone of your video. Lightworks offers a library of royalty-free music to help you find the ideal soundtrack.
Volume Control is Your Friend: Just as you'd adjust the heat while cooking, use volume control to balance audio levels. Ensure that your dialogue, music, and sound effects are at appropriate volumes. You don't want one element drowning out the others.
Let's talk about colour correction and grading. Just like how the perfect lighting and ambiance in a top-notch restaurant can turn a meal into an unforgettable experience, nailing the colour in your video can elevate it from bland to blindingly brilliant. And don't get me started on those who ignore this step – it's a recipe for disaster!
Understanding Colour Theory: Before you even start fiddling with the tools, get your head around colour theory. It's like knowing your flavours before you cook. Complementary colours, tones, and moods – these are your ingredients. Use them wisely to convey the right emotions, just like choosing the right spice for your dish.
Balancing Act with White Balance: If your video looks like it's been shot in a snowstorm or a heatwave, you're doing it all wrong. Use Lightworks to adjust the white balance, for heaven's sake. It’s about finding that sweet spot where the colours look natural, just as you would balance flavours in a dish.
LUTs – Your Secret Sauce: Think of Look-Up Tables (LUTs) as your secret sauce. They can transform your footage with a single click, giving it a professional, cinematic quality. But don't just slap them on like ketchup on a steak. Choose and tweak them like you're seasoning a Michelin-star dish.
Play with Colour Wheels: The colour wheels in Lightworks aren't just for show. They're like adjusting the heat in cooking – too much and you'll burn it, too little and it's raw. Use them to tweak the shadows, midtones, and highlights. Get the balance right, and your video will sing.
Consistency is Key: Consistency in colour grading across your project is crucial. You wouldn't serve one course of your meal cold and the next scalding hot, would you? Make sure your scenes flow seamlessly into one another, maintaining a consistent look and feel.
Think of these as the menu of your video. It's the first thing your audience will 'taste', so you can't afford to muck it up. It’s like presenting a menu in a top-notch restaurant – it needs to be appetising, not something that looks like a toddler's art project!
Keep It Simple, Stupid (KISS): Don’t overcrowd your video with flashy titles and over-the-top graphics. That’s like over-garnishing a dish until you can't see what’s underneath. Stick to clean, simple graphics that complement your video, not distract from it.
Font Flavour – Choose Wisely: The font you choose is like the seasoning of your dish. It adds personality. Choose a font that matches the tone of your video. A horror film? Go eerie. A corporate presentation? Keep it sleek and professional. And for heaven's sake, if you use Comic Sans, I'll have words!
Consistency is King: Keep your titles and graphics consistent throughout the video. It’s like a meal where each course complements the other. Avoid jarring your audience with wildly different styles – it’s disorienting, like serving fish and chips with a side of tiramisu.
Timing – Don’t Rush or Dally: Get the timing of your titles right. They need to be on screen long enough to be read but not so long that they bore your viewers to tears. It's like cooking – timing is everything. No one likes an undercooked steak or an overcooked egg.
Motion Graphics – Add a Bit of Spice: If you’re feeling adventurous, throw in some motion graphics using Lightworks. But remember, less is more. It’s about enhancing the viewer's experience, not giving them a visual overload. It’s the difference between a perfectly seasoned dish and one that’s swimming in sauce.
Alright, you've slaved away in the editing 'kitchen', and now it's time to plate up this masterpiece and see if it's worth the diners’ - I mean, your audience's time.
Listen, exporting your video is like the final cook on a perfect steak. You've done all the hard work; don't ruin it at the last minute with a botched export. Lightworks lets you export your video in a smorgasbord of formats – it’s like making sure your dish can be enjoyed by everyone, regardless of their dietary preferences. But, for the love of good food, don't rush this part. Exporting is like letting a steak rest – it needs its time. Do it right, or you'll end up serving a culinary disaster as appealing as a soggy, microwaved lasagna.
Sharing your video is like opening the doors to your restaurant. You can't just throw your dish onto the table and hope for the best. Sharing your work on platforms like YouTube or social media is like inviting guests to dine at your table. You need to engage with them, understand what they loved, and what made them gag. It's all about refining your craft based on customer feedback.
Remember, you absolute doughnuts, every comment, like, or share is a punter giving you a nod or a shake of the head. Use it to improve, to tweak your recipe, to make your next dish – I mean, your next video – even more mouth-watering.
So, get out there and share your culinary – I mean, editing – genius with the world. And for goodness' sake, make sure it's worth their time, you donkey!
Thanks Rordon! We'll take it from here...
For deeper dives into editing techniques and Lightworks tutorials, visit Lightworks Resources. Enhance your skills, discover community insights, and bring your creative visions to life.
Transform your video editing journey with Lightworks. Whether crafting a short film, a documentary, or a personal vlog, Lightworks gives you the tools to tell your story your way. Download now and embark on your path to becoming a master storyteller.
Edit: There have been accusations that Rordon Gamsey is, in fact, celebrity chef Gordon Ramsey. This is 100% inaccurate, and we would thank you to stop making such unfounded comparisons.