
Effects change how a clip looks or sounds - from a simple resize to a full grade. In Lightworks you add effects to clips or tracks, adjust them in the FX Settings panel, stack and reorder them, and animate them with keyframes. This article covers how effects work in general; later articles cover specific kinds.
Segment effects versus track effects
Effects apply at two levels:
- Segment (clip) effects affect a single clip on the timeline. Most effects are applied this way.
- Track effects affect a whole track, processing everything on it. Use these when you want effects across many clips at once.
For other ways to treat a built section as one item, see Reusing sequences and building blocks.
Adding effects
Select a clip (or target a track), then add the effect you want from the effects panel. It's added to that item's effect stack and its controls appear in the FX Settings panel, ready to adjust. Effects are non-destructive - they never change your source media, and removing an effect returns the clip to its original state.
Opening effect settings
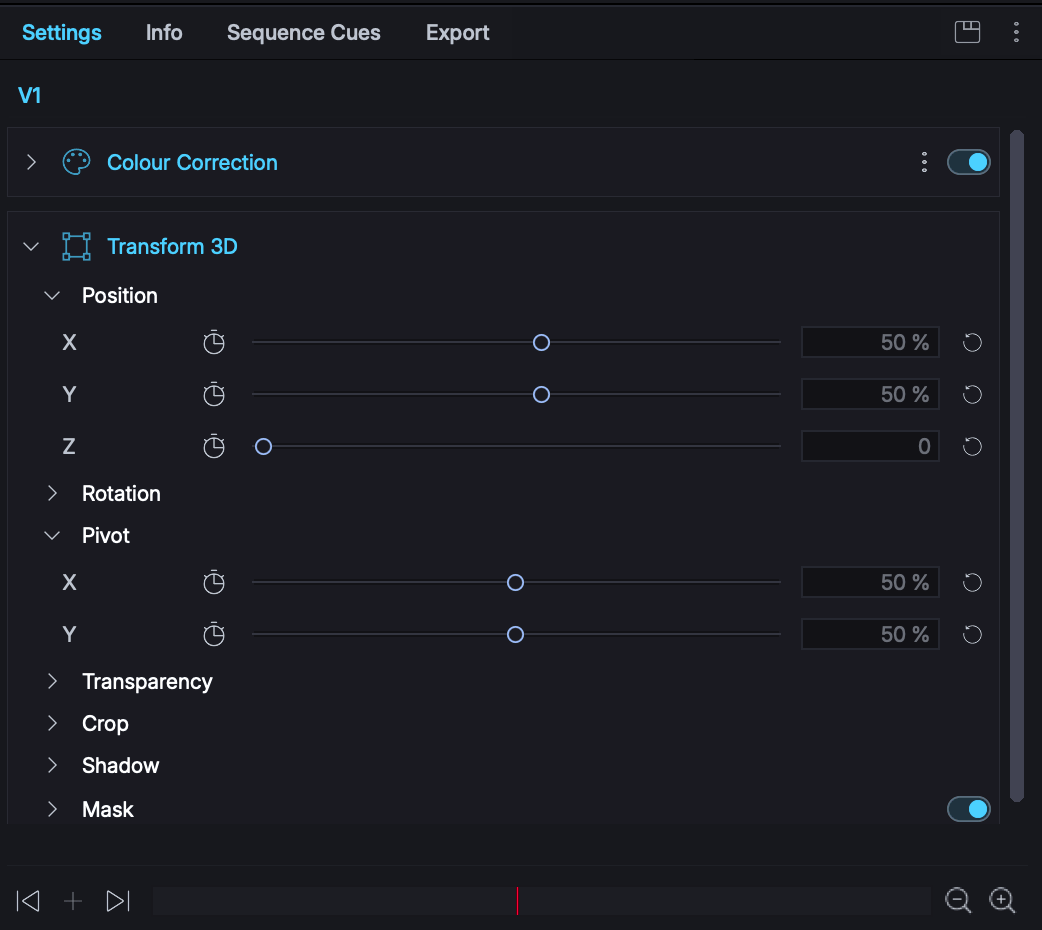
The Effects Settings panel is where you adjust an effect. In v2026 it has a refreshed layout with sensible defaults and includes:
- Category icons for quick visual scanning.
- Ordering define the order effects are applied.
- Precision scrolling for fine parameter adjustment with a mouse wheel or trackpad.
- A focus on the selected clip's effects, with an Active Clip Only mode to hide effects from other tracks.
- The ability to switch some values between pixels and percentage.
Enabling and disabling effects
Toggle an effect off to see the clip without it, and on again to restore it - the fastest way to judge whether an effect is earning its place. Disabling keeps the effect and its settings; it just bypasses it.
Removing effects
Remove an effect to take it out of the stack entirely. The clip returns to how it looked below that effect in the stack.
Reordering effects
Effects process in sequence, and order changes the result (a crop before a resize looks different from a resize before a crop). Use the reorder arrows to move effects up and down the stack until the chain does what you want.
Copying and pasting effects
Right-click a clip and choose Copy Effects, then Paste Effects... on the destination. The Paste Effects dialog gives fine control over the transfer:
Keyframes (how animation is handled):
| Option | Effect |
|---|---|
| Retime To Fit | Retimes keyframes proportionally to fit the length of the destination clip |
| Keep Original Timing | Keeps the absolute keyframe timing of the original clip |
| Reset All Parameters | Pastes the effects with all keyframed parameters reset |
Paste behaviour (what happens when the destination already has effects):
| Option | Effect |
|---|---|
| Paste as New Effect | Always paste a new copy of the effect |
| Update Existing Effects | Replace the parameters of an existing effect of the same type |
| Skip If Effect Already Exists | Don't paste if the effect already exists on the target |
Target - paste onto the selected clips only, or onto All Matching Clips in the timeline (every use of the same source clip), which is the fast way to treat a whole scene.
You can also pick which effects to copy rather than transferring the whole stack.
Tip: To apply one grade across a scene, set it on a hero shot, copy it, then paste with Update Existing Effects onto All Matching Clips - and you can keep tweaking afterwards.
Saving effect templates
When you build a look you'll reuse, use Create template from segment effects to save the clip's effect stack as a template, one click away on future clips and projects. This keeps treatments consistent and saves rebuilding them by hand.
Understanding effect parameters
Most effects expose parameters - numeric or colour controls such as position, scale, softness, or level. Drag a control or type a value to adjust it; precision scrolling gives fine control. Any active parameter can be keyframed to change over time (see Keyframes and animation).
The Video Routing panel
For advanced work, the Video Routing panel shows the effects on a clip as a node graph - each effect is a node, with connections showing how the image flows through them. Here you can rewire the routing itself: change which effect feeds which, cycle a node's inputs, and build arrangements that a simple top-to-bottom stack can't express. An automatic positioning option keeps the graph tidy, and each node's settings are a click away.
Most editing never needs the routing panel - the effects stack covers day-to-day work - but it's there when an effect needs a second input or a non-linear arrangement.