
Create Your First Edit
This is the fastest route from a blank project to a finished video. It skips the detail so you can see the whole workflow in one go - each step links to a fuller article when you want to dig deeper.
You'll create a project, import some footage, cut it together on the timeline, trim and polish it, then export the result.
Note: You'll need a few video or audio files to work with - any footage will do.
Step 1: Create a project
A project holds all your clips and sequences in one place.
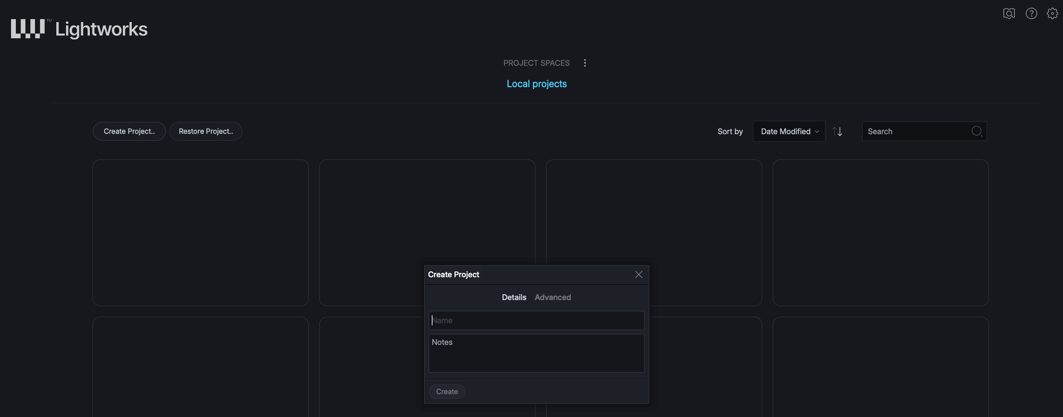
- In the Project Browser, click Create Project.
- Type a name for your project.
- Click Create.
Your new project opens, ready for media. There's nothing to save - Lightworks saves everything as you work, automatically and continuously.
Step 2: Import your media
Next, bring your footage into the project.
- Click the Import clips button to open the Import panel.
- Browse to the folder containing your video, audio, or image files.
- Choose how to bring the media in (see the table below).
- Select the clips you want, then click Import.
Your imported clips appear in the Content Manager, ready to use.
| Method | What it does | When to use it |
|---|---|---|
| Create Link To Media | References each file where it already lives, without copying | Fastest option; when you want to leave media in place |
| Copy Media To Project | Copies files into your project's media folder | To gather everything together in one place |
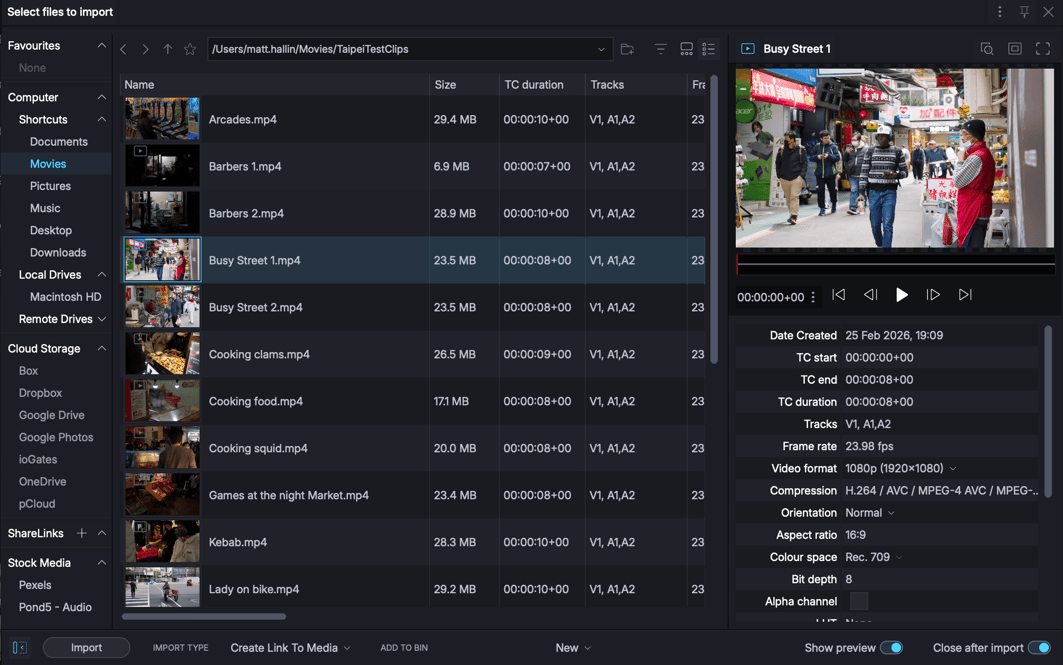
Tip: Not sure which to pick? Create Link To Media is the quickest way to start editing.
Step 3: Review and mark a clip
Before adding a clip to your edit, find the part you actually want to use.
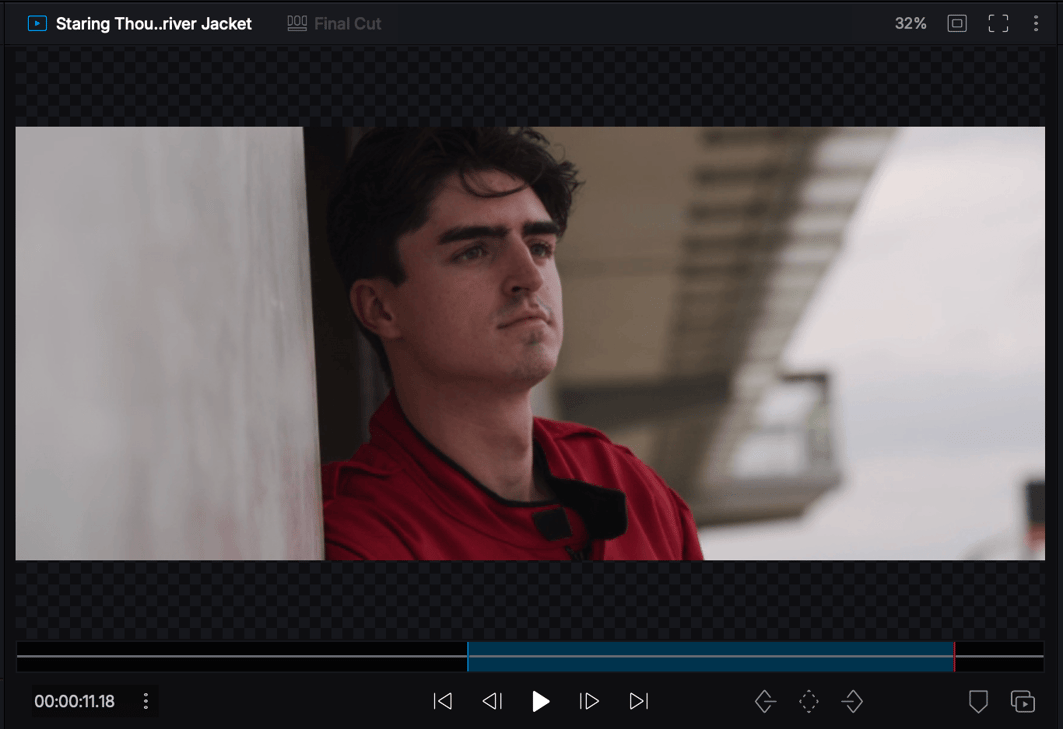
- Double-click a clip in the Content Manager to open it in the source viewer.
- Play and scrub through it to find your section.
- Press
Ito set the mark in point where the section should start. - Move the playhead to where the section should end.
That's all you need - Lightworks uses the current playhead position as the end, so you don't have to set an out point. This is known as mark and park.
| Key | Action |
|---|---|
Space |
Play / pause |
J / K / L |
Play reverse / pause / play (tap repeatedly to go faster) |
I |
Mark in |
O |
Mark out |
Step 4: Build your sequence
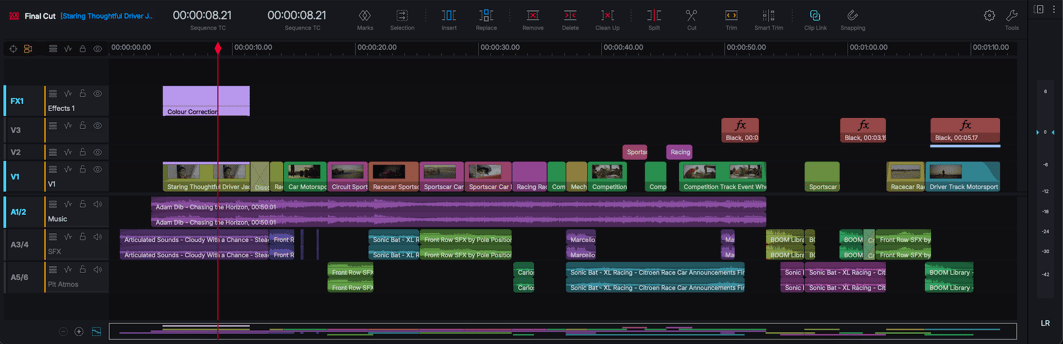
A sequence is your edit: clips cut together on the timeline. A new project already has an empty sequence ready in the timeline.
- With a clip marked in the source viewer, click Insert to add the marked section to the sequence.
- The playhead moves to the end of what you just added.
- Open your next clip, mark it, and Insert again.
- Repeat to build up your edit.
You can also drag a clip onto the timeline - straight from the Content Manager, or from the source viewer.
Tip: Press
Spaceover the timeline to play back your sequence at any time.
Step 5: Trim a cut
Trimming fine-tunes where one clip ends and the next begins.
- Move your mouse close to the cut between two clips - the pointer changes to a trim cursor.
- Click and hold, then drag left or right to shorten or extend the clip.
- Release the mouse button - the trim is applied and finished.
That's the simplest trim, and it covers most everyday tweaks. There's more when you need it: a single click on a cut opens the trim instead, so you can drag as many times as you like and review the result before closing it with a click away from the cut (or Tab).
Trimming is one of Lightworks' real strengths, and it has a complete section of its own - see Trimming for the full range of techniques.
Step 6: Add a transition
A transition smooths the change between two clips - a dissolve is the classic choice.
- Right-click the cut between two clips on the timeline.
- Choose a transition, such as Dissolve.
- Set the length (how long the transition lasts).
- Click Add.
Note: A transition needs spare footage on both sides of the cut to overlap. If there isn't enough, Lightworks tells you - trim the clips a little shorter and try again.
Tip: For a simple fade to or from black, you don't need a transition at all - drag the fade handle in a clip's top corner, or use the dedicated fade controls. See Video transitions and fades.
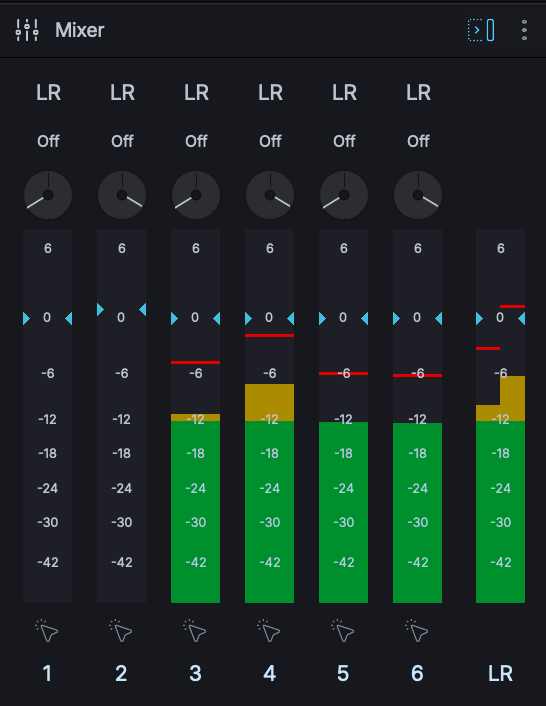
Step 7: Balance your audio
Get your levels sitting comfortably before you export.
- Open the audio mixer.
- Drag a track's fader up or down to set its level.
- Use the LR (master) fader to set the overall level.
- Use solo or mute to check individual tracks.
For fades, levels over time, and the full mixer, see Audio basics.
Step 8: Export your video
When your edit is ready, turn it into a finished file.
- Select your sequence.
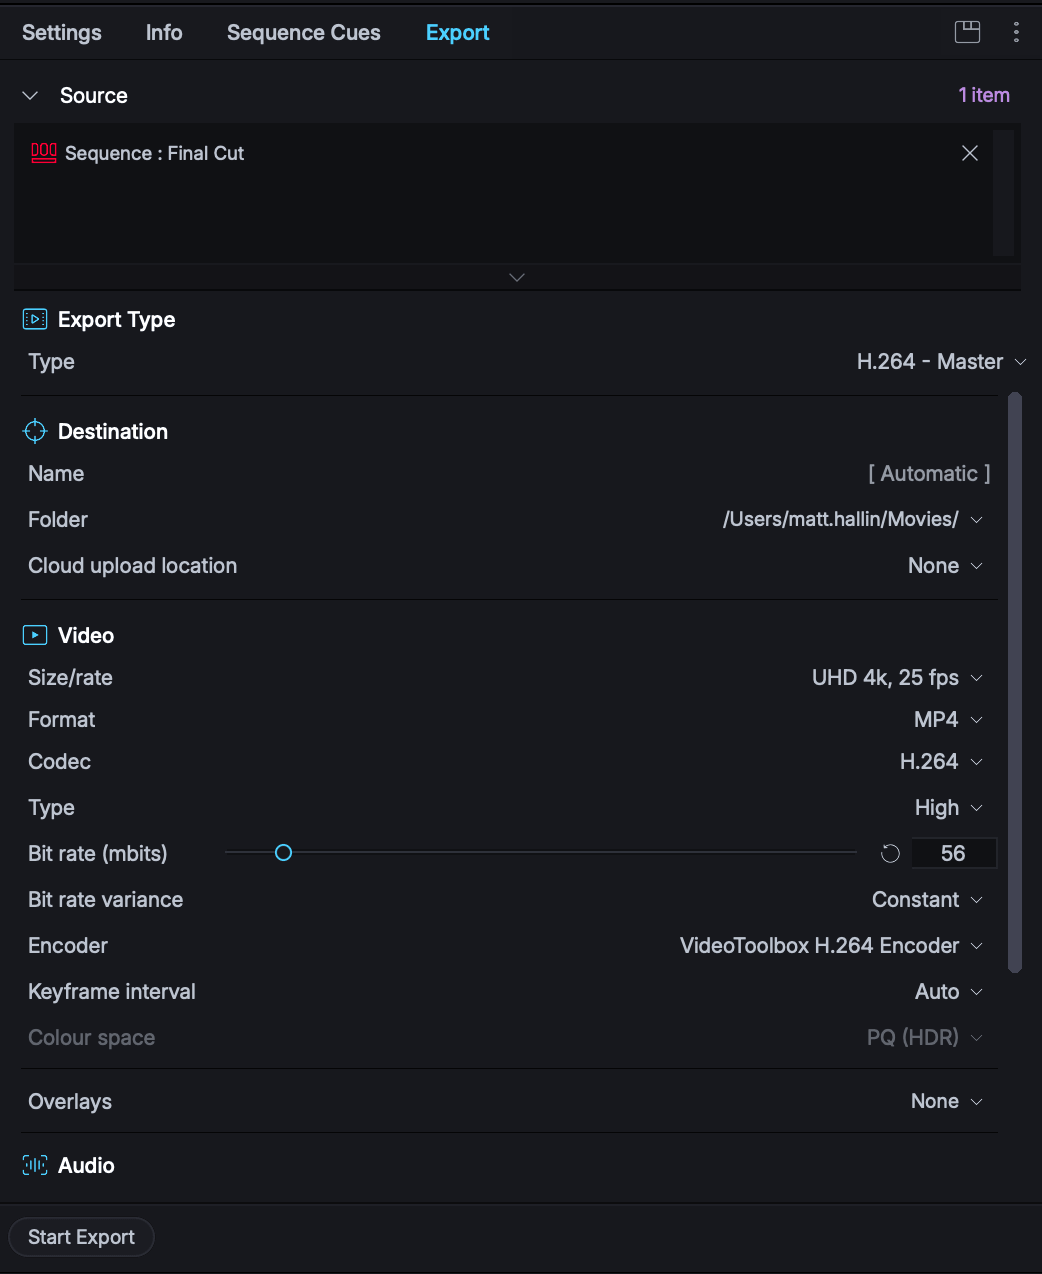
- For a fast file with sensible defaults, right-click the sequence and choose Export, then pick a preset. For full control over format and resolution, open the Export panel.
- Choose your settings - MP4 is the default and a safe choice for most uses.
- Click Start and choose where to save the file.
To publish straight to the web, choose YouTube as the destination and sign in when prompted.
Where to go next
That's a complete edit, start to finish. To build on it:
- The Lightworks interface - learn your way around the panels.
- Importing media - formats, linking, and managing media.
- Basic editing - insert, replace, delete, and arrange clips.
- Trimming - the full set of trimming tools.
- Audio basics - mixing, fades, and levels.
- Export overview - formats, presets, and delivery.