Open Lightworks and enter a project.
At the top to the right-hand side of the tabs, click the + icon.

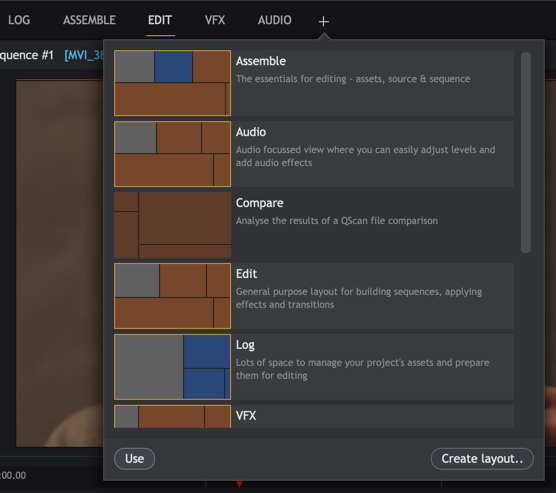
The active tabs that will appear at the top show a highlighted border around the thumbnail image.

Click the thumbnail image for the tab you wish to show/hide.
Click ‘Use’ to save the layouts.
Open Lightworks and enter a project.
At the top to the right-hand side of the tabs, click the + icon.
The layout selection will appear.
Click ‘Create layout.’
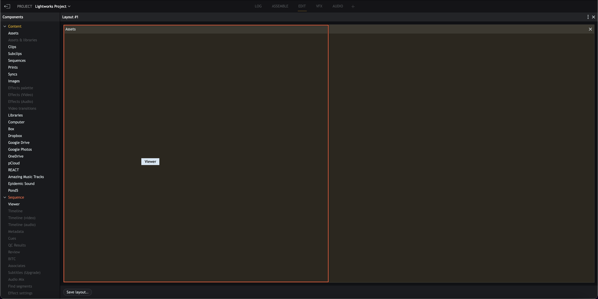
The layout creator will appear.
On the left-hand side appear all the panels that can be used to create your layout. These can be dragged onto the large area to start building your layout.
Click and drag the ‘Assets’ component and drop it into the target area. The panel will appear, filling the space.
The first item you drag will only have one option when dropping. Now that you have your first component, you will have options for dragging the next component over the area.
Click and drag the ‘Viewer’ component under the ‘Sequence’ category.
When dropping it onto the target area, there are five options available depending on where you move your mouse on the target area:
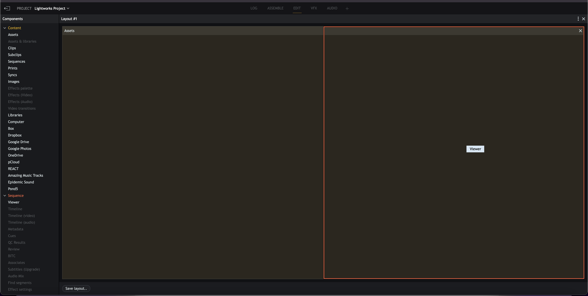
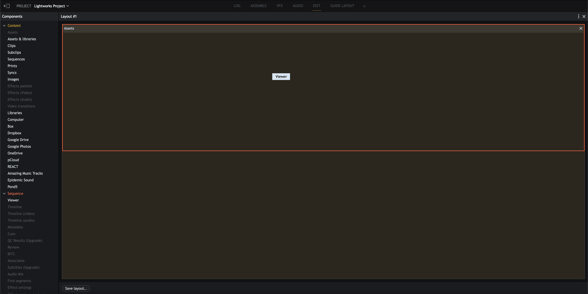
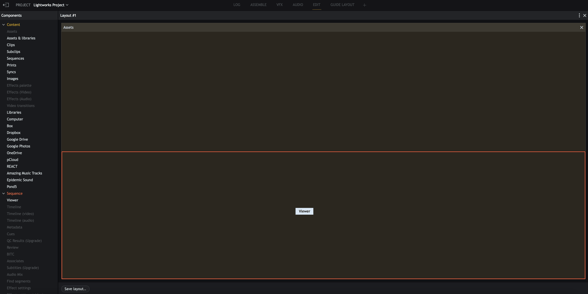
Drop the ‘Viewer’ component to the right of the first panel, the area will change to show where the component will be dropped.
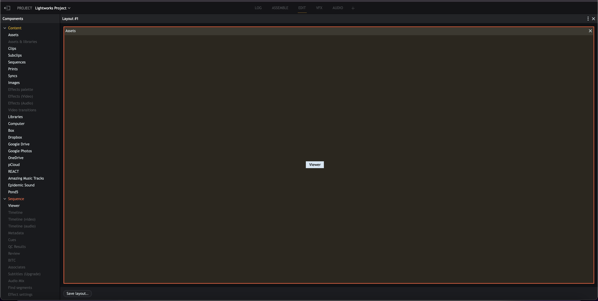
The next item to add would be the ‘Timeline’ Under the ‘Sequences’ heading. Click and drag the ‘Timeline’ component and this time, drop it so that it spans both the two previous components at the bottom of the layout.
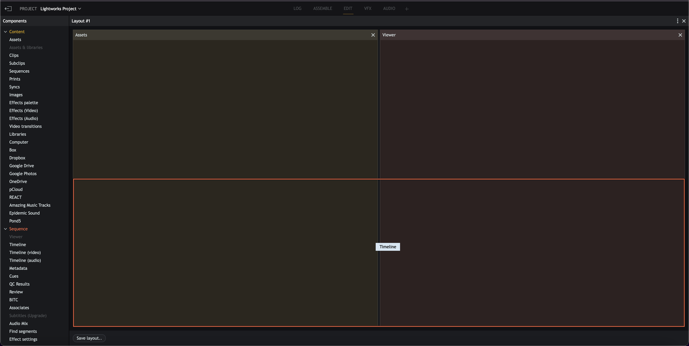
You now have three components making up your layout.
The last item we will add here is the ‘Video Transitions’ component, tabbed with the ‘Assets’ component. Click and drag the ‘Video Transitions’ component and drop it into the middle of the ‘Assets’ component within the layout.
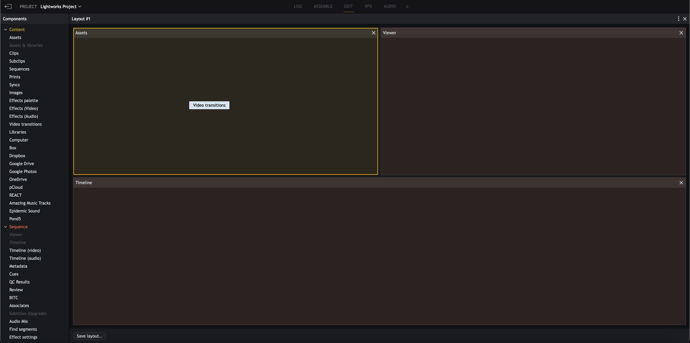
These two components are now tabbed together.
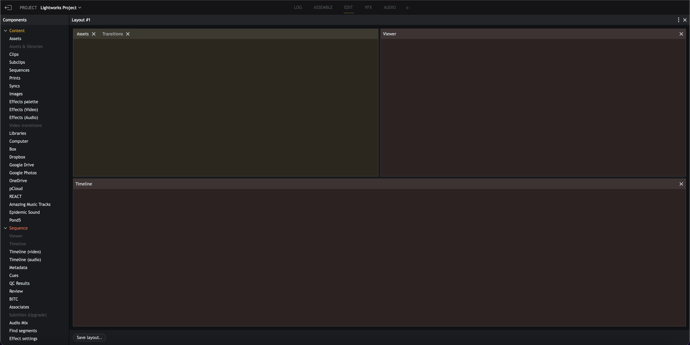
Click ‘Save layout’ to save your layout.
Give the layout a Name and a Description, should you require one.
Click ‘Save.’
The new layout tab appears at the top alongside all the default tabs and will automatically switch to this newly created layout.
Open Lightworks and enter a project.
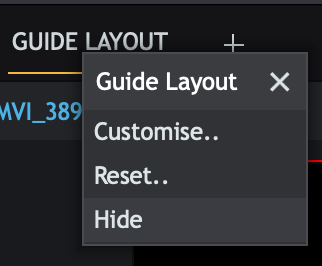
Right-click the newly created layout tab and choose ‘Customise’.
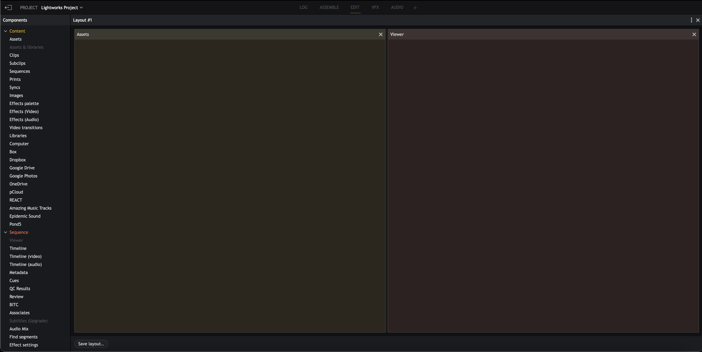
The layout creator appears, showing all the components recently added.
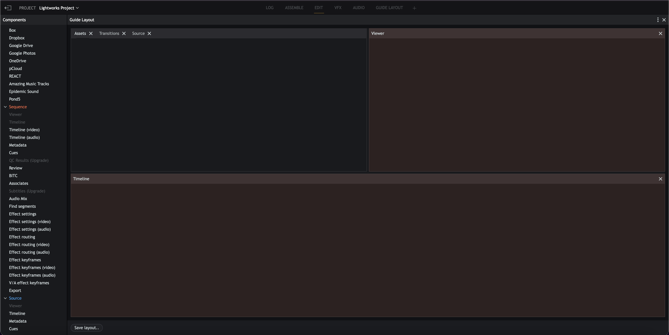
Click and drag the ‘Viewer’ component under the ‘Source’ category and drop it into the middle of the ‘Assets’ component within the layout.
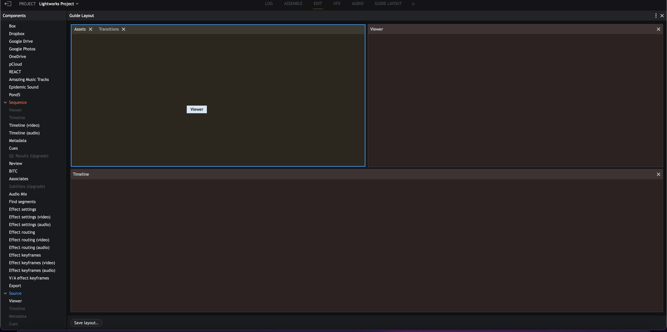
This new Viewer component is now tabbed with the other components.
Click ‘Save layout’.
Leave the name the same and click ‘Save’.
A warning will appear asking if you want to overwrite the existing layout; click ‘Yes’.

The modified layout is saved and immediately opened. If you changed the name prior to clicking ‘Save’ a new layout is created rather than overwriting the existing one.
Open Lightworks and enter a project.
At the top to the right-hand side of the tabs, click the + icon.

The layout selection will appear.
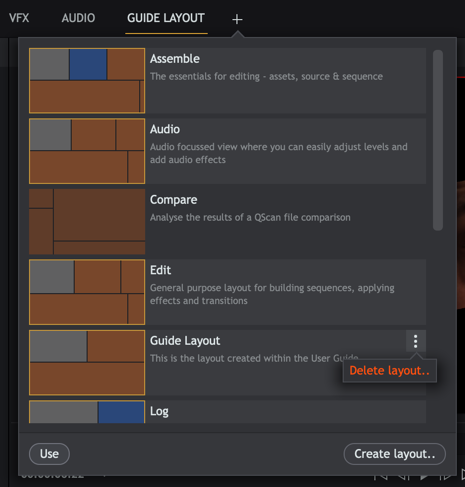
Scroll to find the layout you wish to delete.
Either right-click the layout or click the settings icon (three vertical dots) on the layout.
Click ‘Delete layout’.
Click ‘Yes’ to delete the layout from the list.
Open Lightworks and enter a project.
At the top right, click the tab you wish to reset.
Click ‘Reset.’
A popup will appear asking if you want to reset the layout; click ‘Yes’.
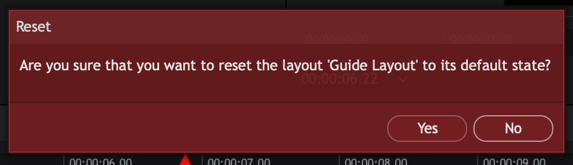
The layout will be reset to the previous saved state.
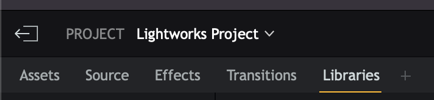
Open Lightworks and enter a project in the EDIT tab.
The tabbed area in the top left-hand corner will show the tabs Assets, Source, Effects and Transitions. Next to these tabs is the + icon.

Click the + icon.
A list of all the available components that can be added to the tabbed panel will appear.
Toggle the icon to enable ‘Libraries’ under the ‘Content’ category.
The ‘Libraries’ tab appears on the tabbed panel alongside the default tabs.
You can add/remove as many tabbed panels as you require.