Projects

Applies to 2022.3 onwards

Free
Create
Pro

Overview

A Lightworks project is used to organise all your media, it holds all the information about assets, including clips, subclips and sequences. Once a project is created, it never needs saving, this is because Lightworks saves your project every few seconds to make sure you never lose any of your work for whatever reason. You will not find a ‘Save’ or ‘Save as…’ within Lightworks because it is simply not required. 

The Lightworks ‘Projects’ folder can be found in the default location below:
The Lightworks Project folder location can be changed with an active Lightworks Pro License.


Windows:     C:\Users\Public\Documents\Lightworks\
macOS:         /Users/USER ACCOUNT/Lightworks/
Linux:         /Home/USER ACCOUNT/Lightworks/


Tip: You can right click a project on the project browser and choose Reveal which will open the folder project location on the operating system you are using.  

Media is not stored in the project folder; video files are Stored in the ‘Material’ folder and the audio files are stored in the ‘Sound’ folder. These folders can be found in the default location below:


Windows:     C:\Users\Public\Documents\Lightworks\Media
macOS:         /Users/USER ACCOUNT/Lightworks/Media
Linux:         /Home/USER ACCOUNT/Lightworks/Media


Additional media locations can be added on the Media tab of the Project Card. A project can contain tens of thousands of individual assets, all of which can be recalled very quickly when searching.

Creating a New Project

1

Click on the ‘Create a new project’ link.

Project Browser (No hint and arrow)
2

When the dialog box opens:

  1. New projectType a name for your project in the Name text box.
  2. Optional: Click the Advanced tab to define custom Asset or Marker metadata. For detailed information about Custom Metadata, please refer to the Lightworks User Guide here: https://app.lwks.com/downloads/lightworks under ‘Documentation’
  3. Optional: Add notes relevant to your project.
  4. Click Create.
3

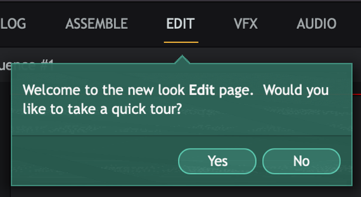
A new, empty project is created and will open with the Edit tab selected.

4

A tooltip will display, prompting you to take a quick tour of the application (strongly recommended).

image16
5

The next step is to get media into the project you want to edit by importing media from a device or hard drive.

Opening an Existing Project

1

In the Project Browser, double-click on the tile representing the project you want to open.

Opening existing project
2

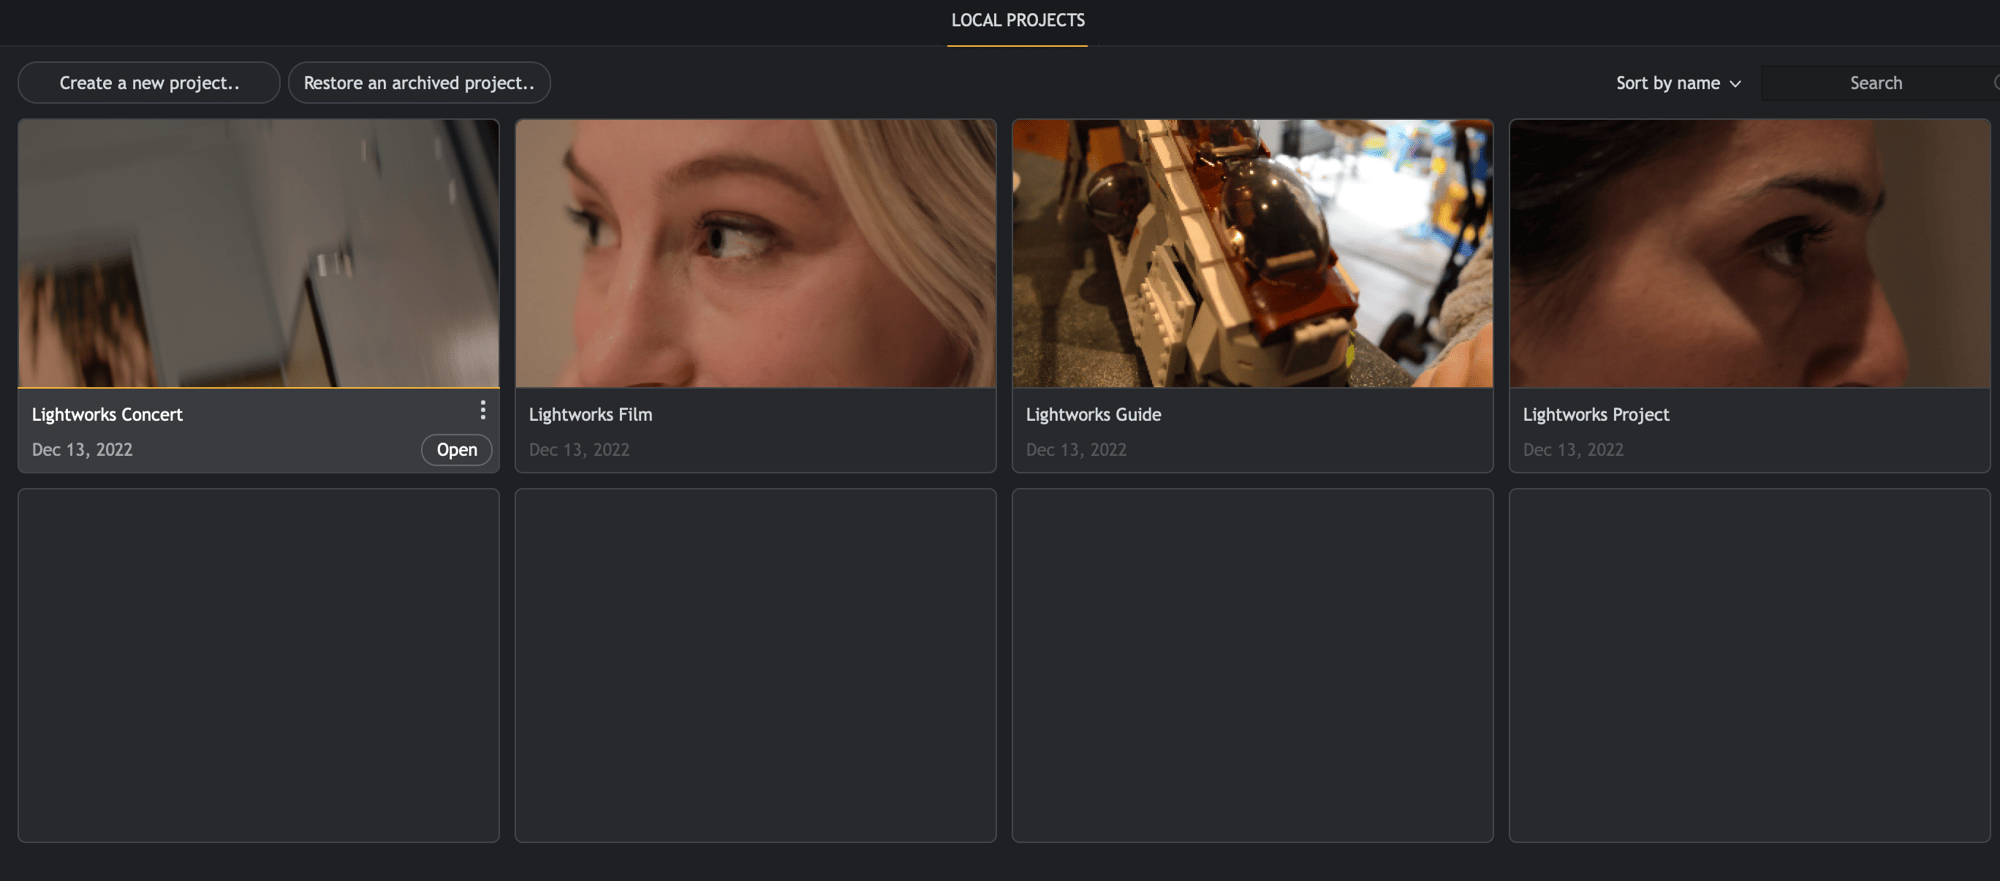
If there are too many projects to display on screen at once:

  1. Use the scroll bar at the right-hand side to reveal projects hidden from view.
  2. Use the Sort by dropdown option to sort by Name, Creation Date or Modification Date.
  3. Hold down the CTRL or CMD key and scroll with the mouse wheel to change the size of the thumbnail images.
  4. Click on the Search icon, type your search criteria in the open text box, and press Enter. Only projects that match the text you typed are displayed. Double-click on the project you require.
3

Your project opens.

Importing Local Files into a Project

1

Make sure you have the Log, Edit or Assemble tab selected.

2

Click on the ‘Import clips’ button.

3

The Import panel will open.

importing local files copy
4

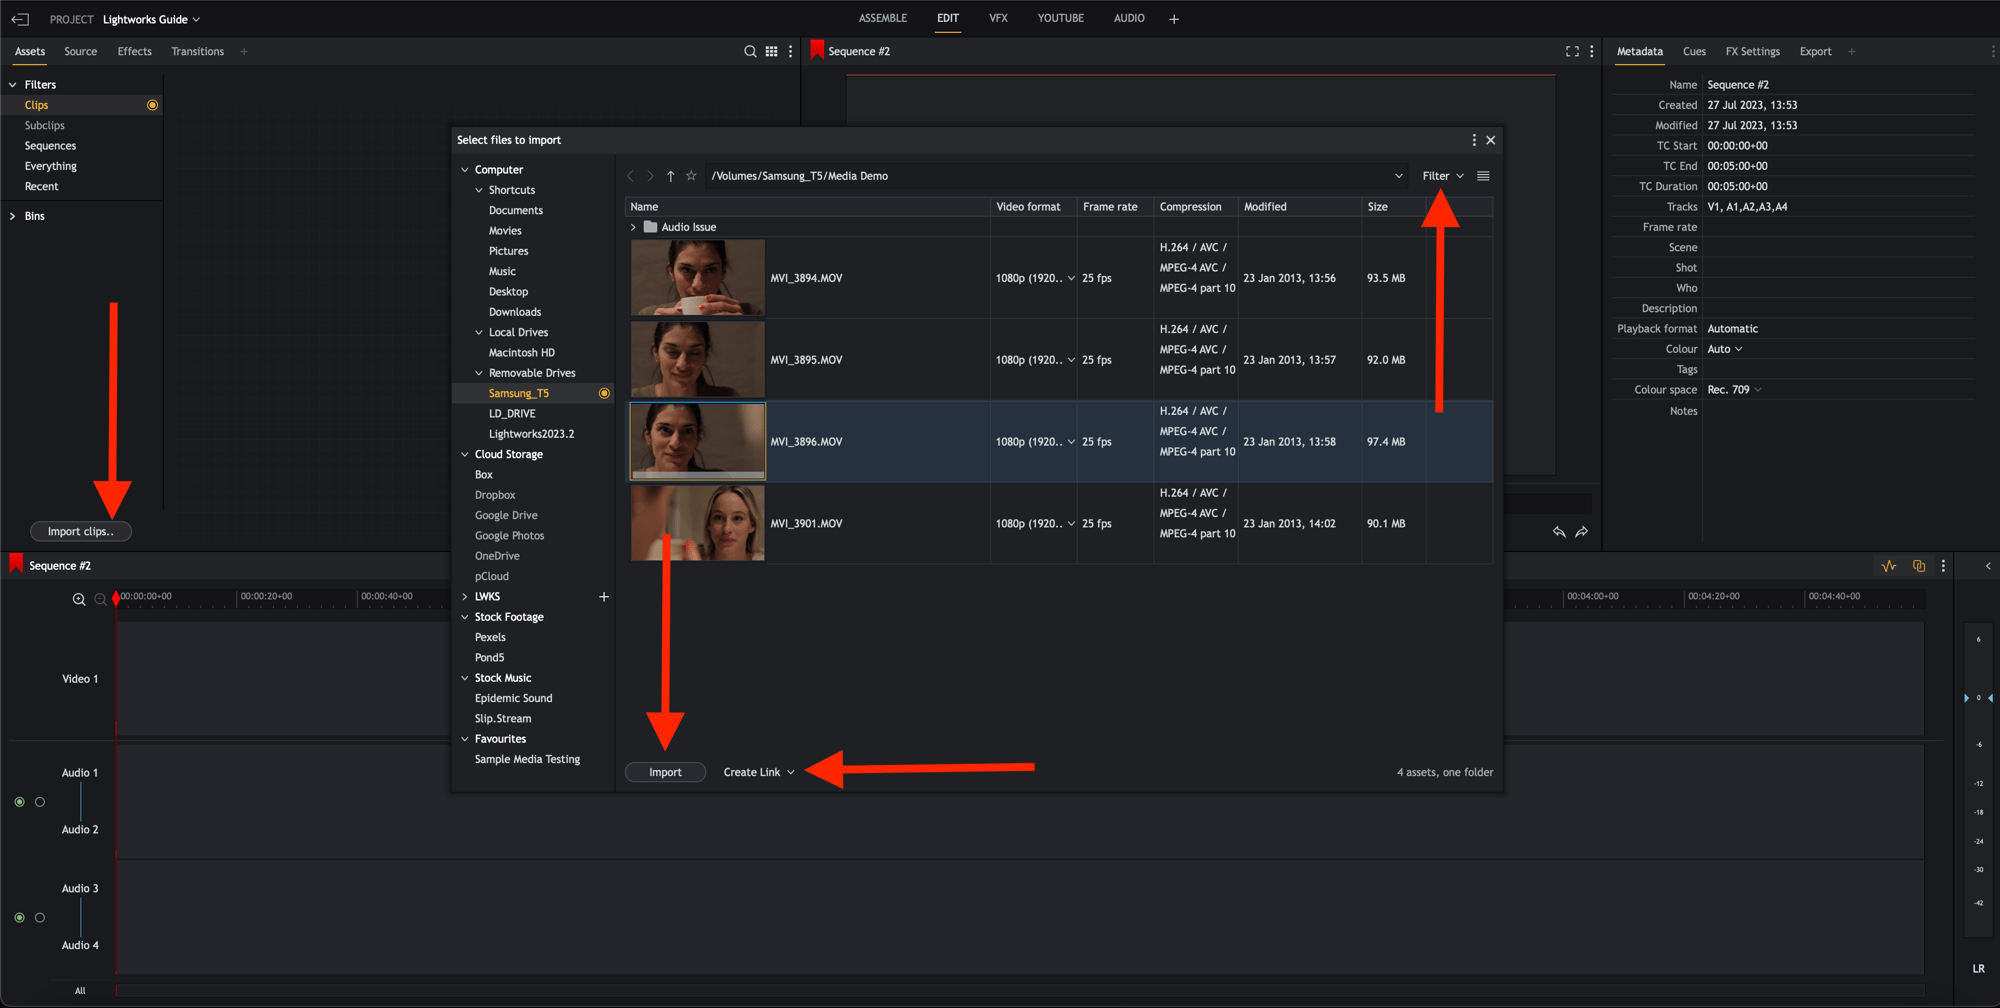
To filter content that is displayed click the Filter arrow and select which content to filter.

5

To change the view between a List or Tile view, toggle the view icon.

6

Click on a clip to select it for import to your project, or hold down the Shift or Ctrl key (CMD key on macOS) to select multiple clips and click the ‘Import’ button.

On importing the clips, the Content Manager auto switches to the Bin or Filter containing the clips you imported.

Double-clicking a clip will load it into the source viewer and import the file into the project.

7

Select the import method from the drop-down list. The options are:

  • Create Link: Keep the imported file in its original location and format so you can work with the file natively. This is useful if you have already copied the media to a local/network drive that is not going to be removed or disconnected.
  • Copy Local: Copies the file into the ‘Material’ and ‘Sound’ folder, without transcoding. This allows the drive containing the original media to be disconnected and reused without affecting the project.
8

Click Import. The clip is imported into the project.

Closing a Project

To close a project and return to the Project Browser, click the  Exit button at the top left of the Project window.


Remember, a project does not need saving, all changes have already been saved automatically.


Deleting a Project

1

In the Project Browser, click on the Settings icon (three vertical dots) for the project you want to delete.

Delete project
2

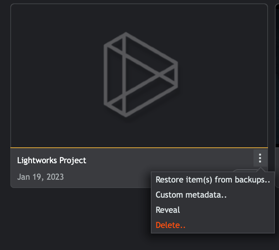
From the menu that opens, click Delete.

3

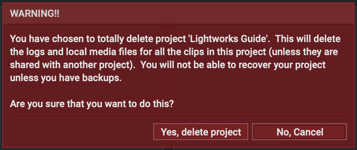
A message box opens, warning you that your project is about to be deleted and that you may lose data.

4

Click Yes to confirm the deletion, or No to cancel the operation.

Delete Project Confirmation

When deleting a project any media that was imported using the ‘Copy local’ or ‘Transcode’ option will be deleted from the ‘Material’ and ‘Sound’ folders unless the media has been copied to another project. 

Any media that was imported using the ‘Create link’ option will not be deleted from its original location, only the small link file that resides in the ‘Material’ and ‘Sound’ folders will be deleted, leaving the original media unaffected by the project deletion.